

I wanted to experiment with videogame concepts but did not want to abandon the web-oriented development workflow with React and TypeScript. WebGL is very well-supported and offers enough performance for a small real-time scene, and the end result can be published to a convenient platform like itch.io. Setting up a toolset make simple playable sketches (“videogame shitposts”?) felt like a fun challenge, without getting bogged down in making a yet another game engine.
For the initial proof-of-concept I wanted to support:
- 3D rendering pipeline
- lightmapping and UV2 auto-mapping
- WASD+mouse input
- top-down physics with wall collisions, movable obstacles, sensors, pleasant “weighty” feel
- CSG-based level geometry
- basic animations for level props like doors
ThreeJS Rendering
Needless to say, ThreeJS is the de facto default for displaying in-browser 3D content. With @react-three/fiber I was able to use this rendering engine but also leverage React to orchestrate scene content, manage loading/adding/removing props and lighting, as well as control the frame loop and post-processing effects.
As with Unity and other engines, scene logic can be organized into components with multiple bundled pieces of functionality. However, unlike Unity a React-based workflow allows a much more flexible “narrative oriented” code structure – basically, to code scene elements as I go and then organize them later as the concepts settle. At least for the demo level, I really appreciated this degree of control to tightly define exactly what is shown in the scene, instead of managing a “soup of entities” like with Unity and other engines.
Input and Physics
I intentionally stuck to a 2D abstraction for in-game physics, similar to older 90s pseudo-3D first-person games. This felt like a good creative constraint to help focus on narrative rather than simulation. Plus, laying out content is much simpler in 2D and there are fewer strange movement glitches and “jank”.
For this I used Box2D, controlling 3D shapes on a top-down plane.
First-person mouselook and WASD keys influence player’s collision body in Box2D via the simple per-frame linear impulse. With heavy linear damping this reproduces a satisfying first-person movement mechanic – sense of inertia combined with reliable “start torque” and a constant maximum movement speed, again similar to iconic 90s first-person games.
Level Geometry and Lightmapping
Classic game engines like Quake and Unreal use constructive solid geometry to define the level shape – for both display and physics collision boundaries. This approach is fine for simpler scenes, and content can be manageably defined in code instead of requiring an interactive 3D editor.
I started out using JSCADv2 modeling primitives for the shape math, but switched to three-csg-ts because latter allowed support for per-face materials. Levels are modeled using subtractive room “brushes”, which produces reasonably robust geometry.

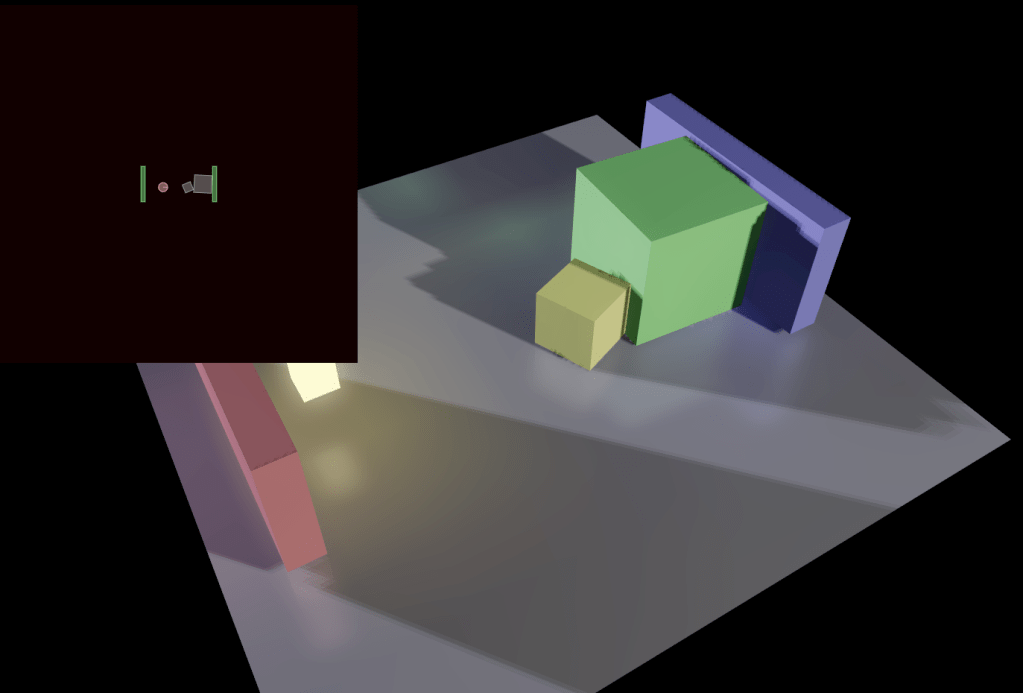
Physics collision walls are computed from the CSG shape by projecting any horizontal faces onto the XY plane and computing a total union polygon shape. Using Box2D ChainShape with the continuous “bullet mode” for the first-person controller body reliably keeps the player inside level bounds, even at high movement speeds. Of course, 2D physics means that traversable bridges and overpasses are not possible in the scene, but it was an acceptable limitation at the time.
For lightmapping, I used my prior work with @react-three/lightmap. The ability to compute the lightmap directly in-browser proved to be a huge productivity boost. The computed radiosity does not have a very high fidelity, but it reminded me of the soft “wax-like” light bounce from 2001’s Max Payne which was an effect I wanted to hold on to.

Lightmap pixelation and “striation” was improved by increasing the probe render target size. Even when keeping lightmap UV2 texels at low resolution (e.g. 0.5m or 1m effective “physical size” per texel) the lighting worked well as a visual cue towards “realism”, while the bake time was very fast – under 1 second for a small level.
Interactivity and Animation
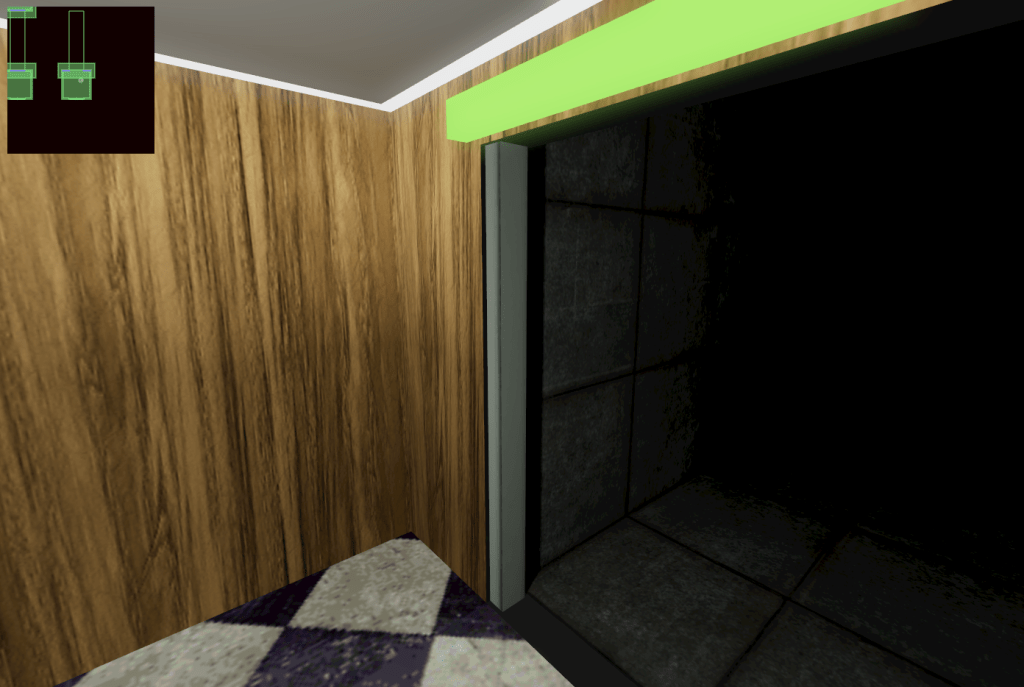
I did not want to bother with mesh/character animation yet, but it was important to at least have basic moving level props, like doors. Because I was using React, I could rely on an existing animation library – react-spring – to automate prop movement. For example, simple elevator door meshes are animated directly with react-spring, and then the door position is tracked inside Box2D collision logic as a kinematic body.
The animation engine inside react-spring actually performs its own simple physics simulation, so the prop movements feel realistic and “right”. It did feel a bit strange to simulate this outside of Box2D’s own integrator, but it let me use the “right tool for the job” and simplified dev ergonomics for defining level props like doors.
Tech Demo
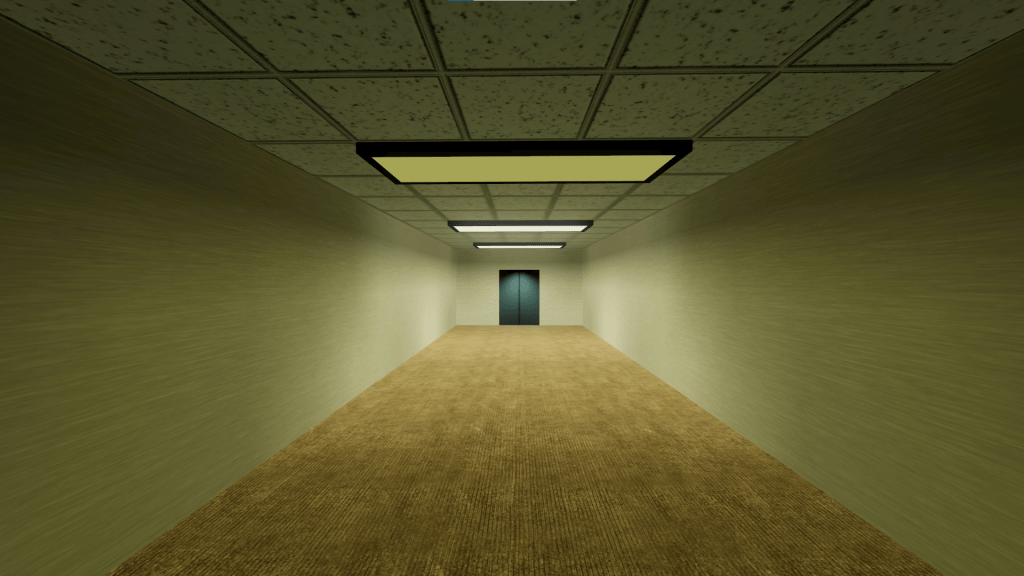
I ended up using all that to make a demo level with about 20-40 seconds of gameplay. Since lightmaps are baked on the fly, I split the experience into smaller “chapters”, with each one computing its own lightmap while the player waits in an in-game elevator.
The tech demo is published on Itch at https://line-ctrl.itch.io/sector3f-demo. Source code is available on GitHub.

You must be logged in to post a comment.